Do you love Notion? Yea, you and a lot of other people. But good news—whether you just have a Notion document that you want to charge for access to, or you've built out an entire website on Notion you can easily transform your Notion site into a full-fledged membership website using Super.so and Outseta. This guide will walk you through that process step-by-step.
If you have a Notion site, you likely already know that one of the limitations of Notion is that you can't add embed scripts to your website pages—unless you also user Super.so, a tool that allows you to add embed scripts to you Notion site.
With Super and Notion, you can easily turn your Notion site into a membership site with Outseta. Because of how Notion sites render Javascript, you'll need to make two minor adjustments.
- You'll need to open Outseta's sign-up, login, and profile embeds as pop-ups.
- You'll need to make one minor update to Outseta's Quick Start embed script by adding a line that says monitorDom: true.
That's it! Otherwise all aspects of implementing Outseta with are exactly the same as any other website builder as outlined here.
Start in Super.so...
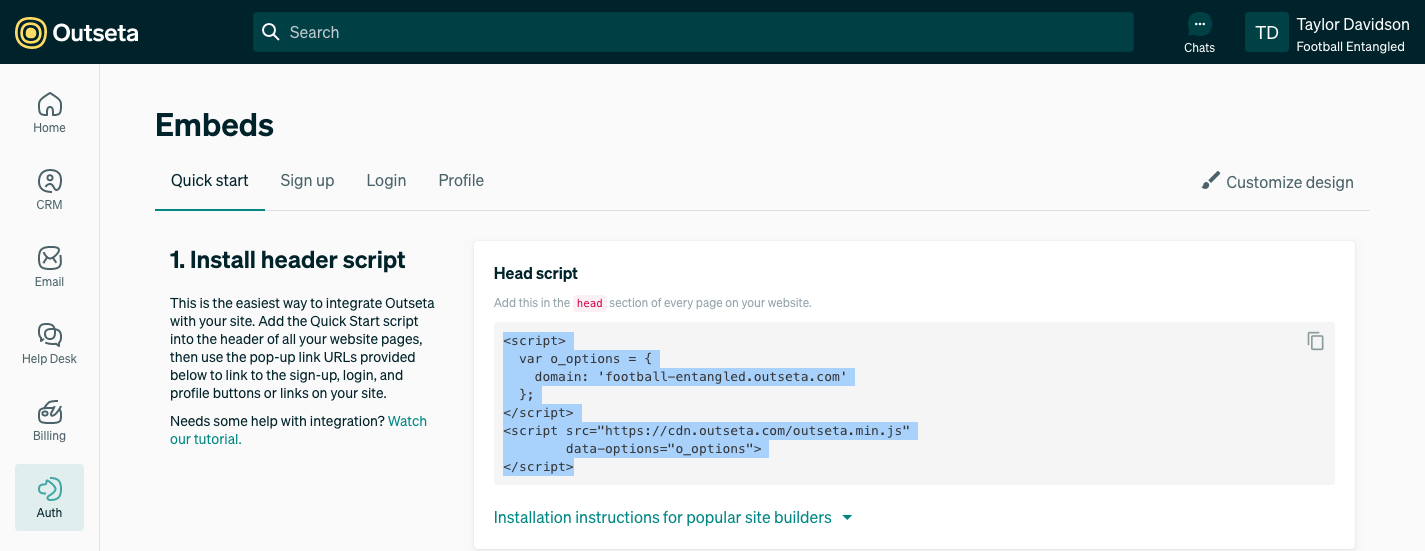
1. Go to the Code section and copy Outseta's Quick Start embed script into the head section. You'll find this code in Outseta on the AUTH > EMBEDS page.
2. You'll need to make one minor modification to the Quick Start embed script.
At the end of the line that starts with domain: 'yourURL.outseta.com' add a coma, then start a new line below. On this line add the value:
monitorDom: true
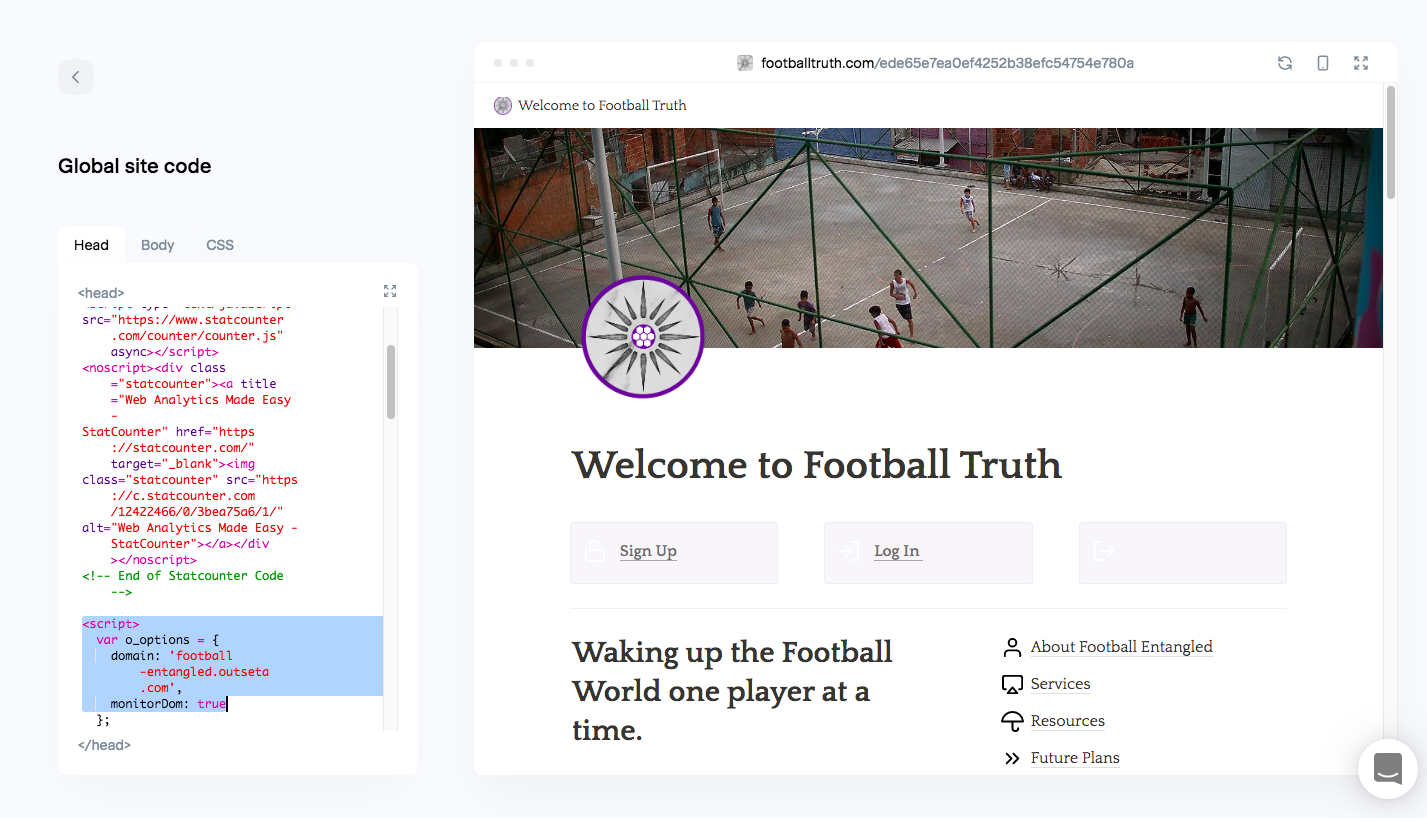
The resulting Quick Start embed script should look like this:
<script>
var o_options = {
domain: 'yourOutsetaURL.outseta.com',
monitorDom: true
};
</script>
<script src="https://cdn.outseta.com/outseta.min.js"
data-options="o_options">
</script>
That's it!
Jump into Notion...
1. Add sign-up, login, profile, and logout links or buttons to your Notion pages. Link those links or buttons to the corresponding pop-up links you'll find at the bottom of the AUTH > EMBEDS page.
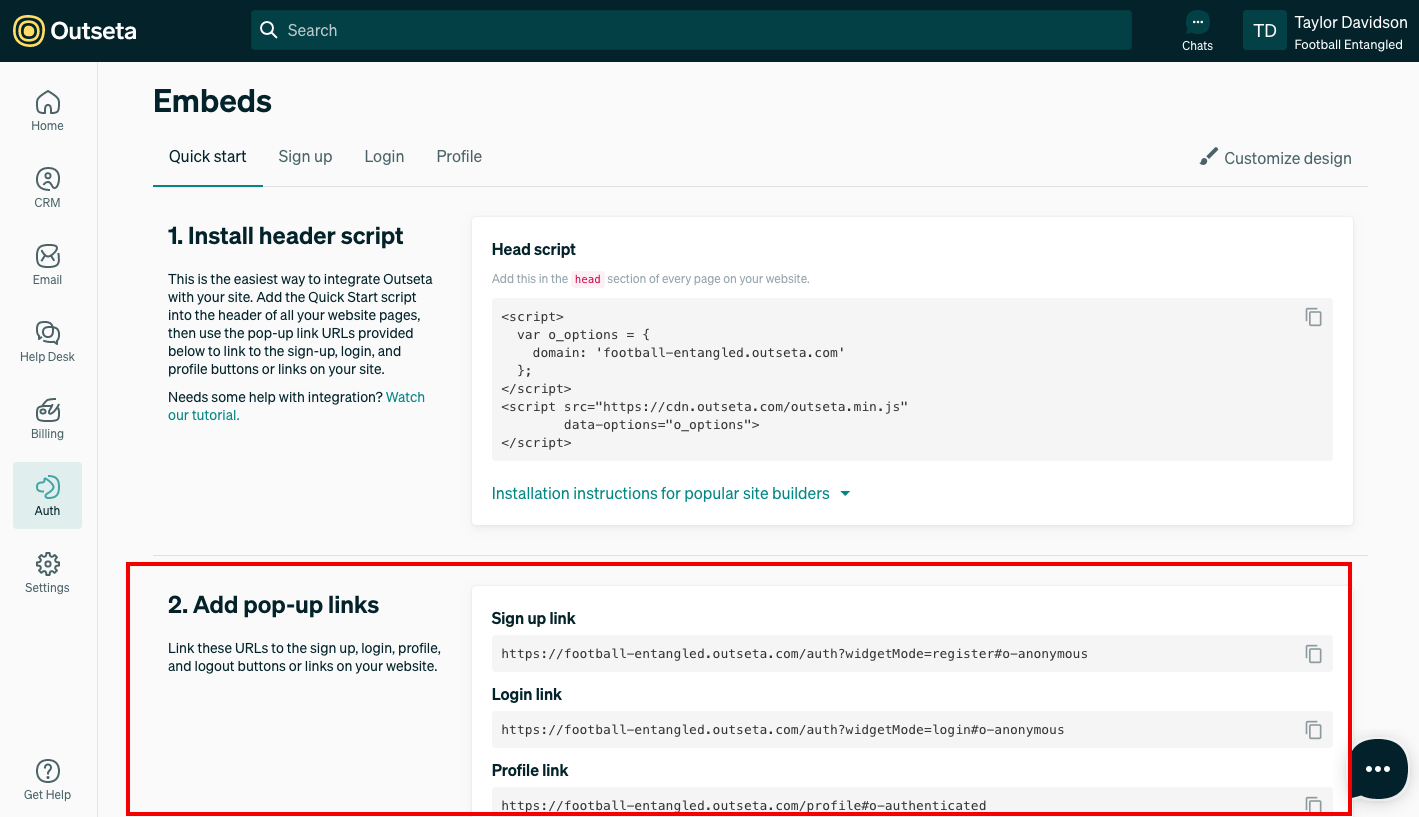
2. PUBLISH your site changes—these buttons or links will now open Outseta's embeds as pop-ups when clicked.
Set up your protected content
Follow the steps outlined below to set up your protected content. Using this method, you can have pages or folders of content that are only accessible to members who have logged in based on their membership plan.
1. Click AUTH > PROTECTED CONTENT from the left hand side bar.
2. Click ADD PROTECTED CONTENT to begin setting up you content restrictions.
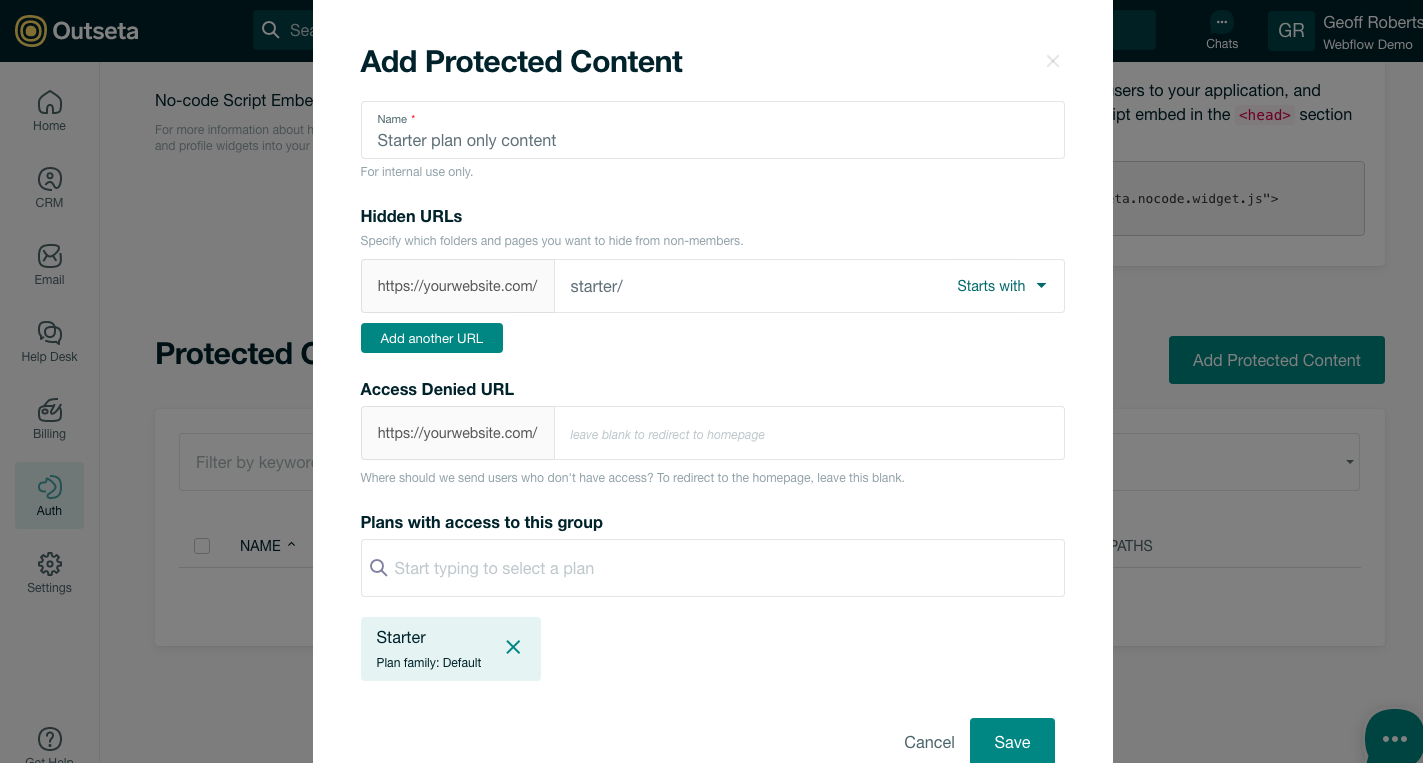
3. Add a Name that describes the content and who will have access to it.
4. Add Hidden URLs—these are the pages and folders that will be protected. Choose the "Starts with" option to protect an entire folder of content or "Equals" to protect a specific page of content.
5. You can also setup a Access Denied URL. This is where we'll redirect users who try to access protected content without the appropriate permissions based on their membership level or if they haven't logged in (authenticated).
6. Start typing to choose which of your membership plans have access to your protected content.
7. Click SAVE. Your content is now restricted based on the membership restrictions that you setup.
If you need any help, please email us at support(at)outseta.com.

